Ready-to-Use UI for the Android Check Scanner Module
With the Scanbot SDK's Ready-to-Use UI Components (RTU UI), you can integrate scanning functionalities into your app with only a few lines of code. This way, you benefit from tried-and-true UX design and straightforward integration while still being able to customize the visual appearance to match your brand.
To achieve an even higher degree of customization, you can implement your own UI and business logic using the SDK's Custom UI Components.
Adding the feature as a dependency
CheckScanner is included in Scanbot SDK package 4. Therefore, add the dependency io.scanbot:sdk-package-4 or higher in your build.gradle:
implementation("io.scanbot:sdk-package-4:$latestSdkVersion")
implementation("io.scanbot:sdk-check-assets:$latestSdkVersion")
implementation("io.scanbot:rtu-ui-v2-bundle:$latestSdkVersion")
Launching the scanner
With just a few lines of code, you can integrate the Check Scanner into your application's workflow. It's as easy as starting an Android activity.
loading...
Changing the visuals to suit your needs
The RTU UI comes with several configuration options for quickly adapting its visual appearance.
Palette
With the RTU UI's palette feature, you can change the components' colors to match your brand design.
loading...
Localization
With the RTU UI's localization feature, you can easily change the strings displayed on buttons, labels and text fields, e.g., for translating them into another language.
loading...
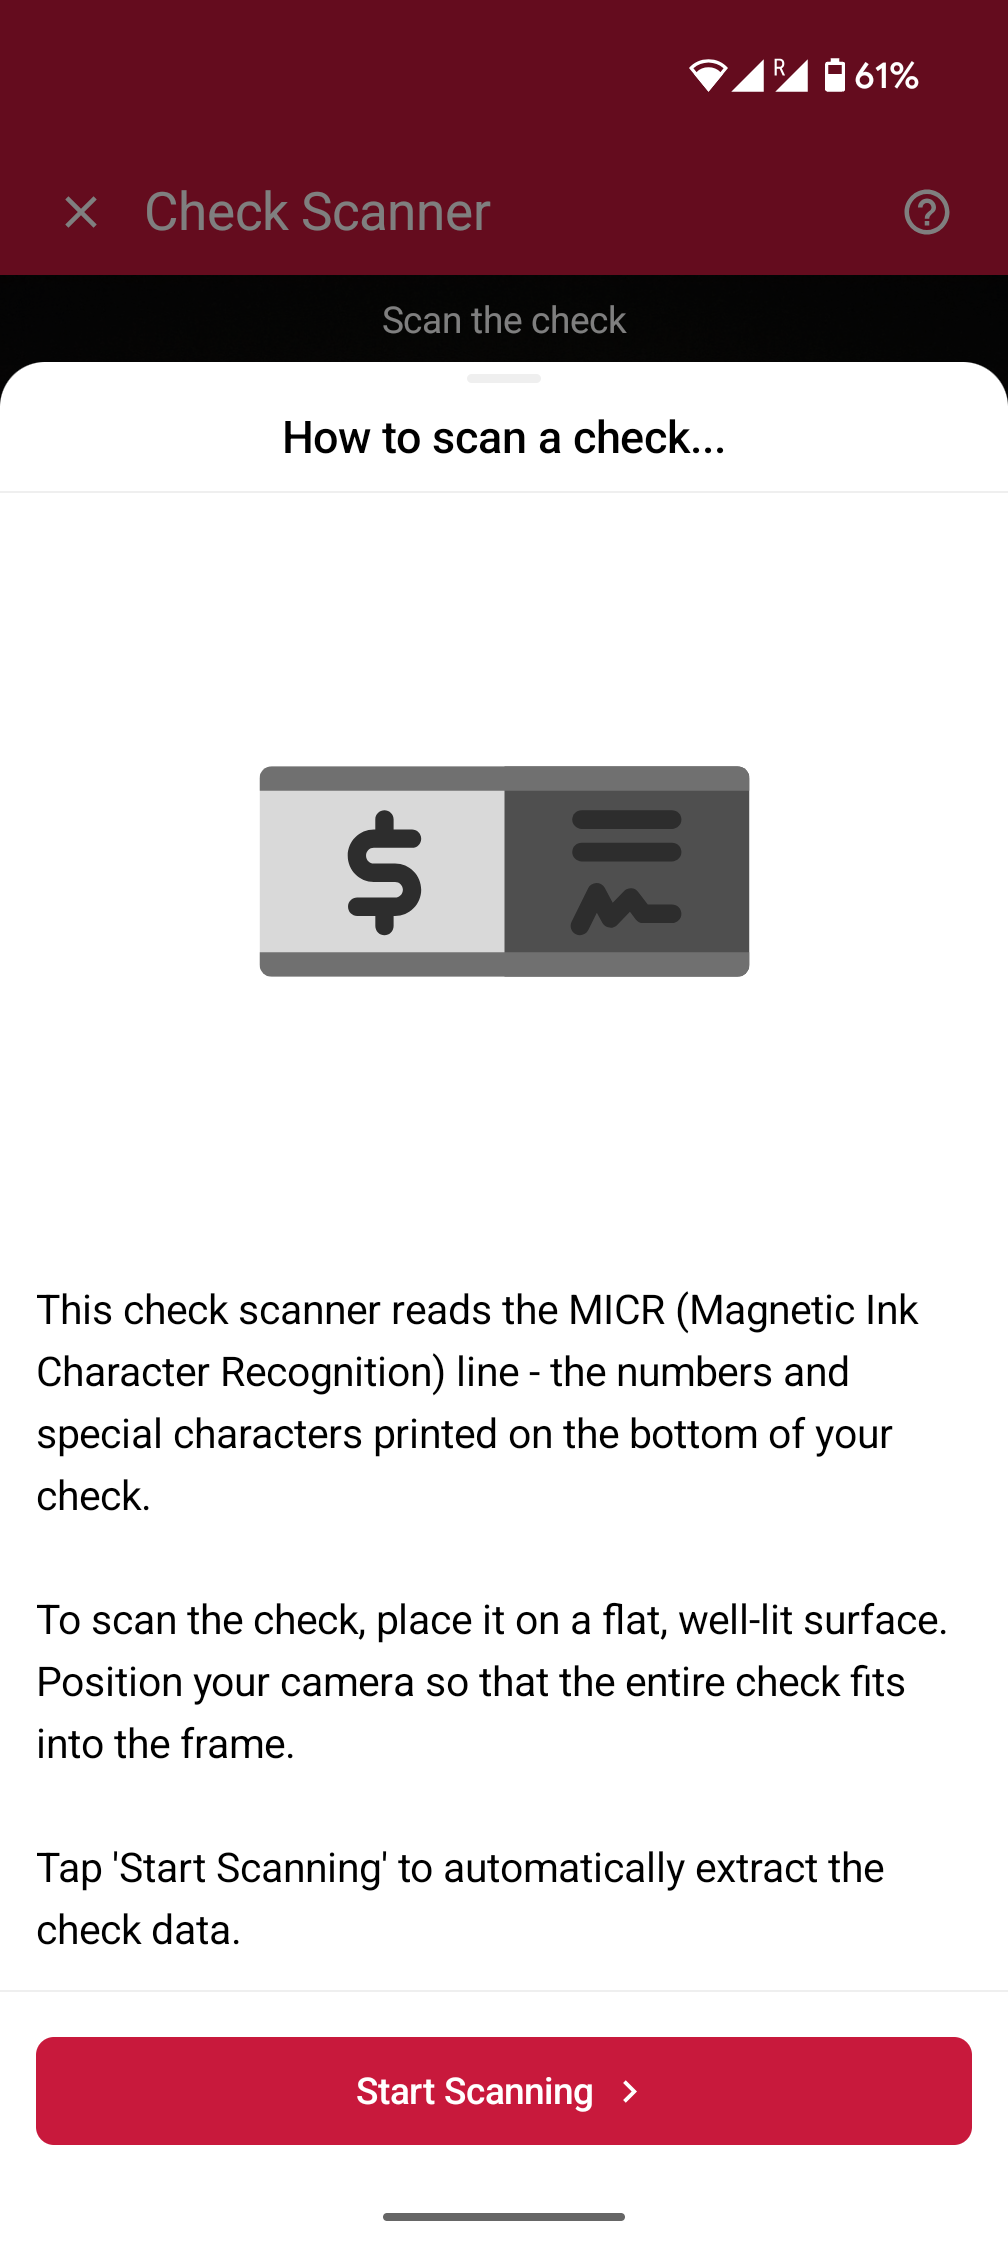
Introduction
The Introduction Screen guides the user by providing an overview on how to use the scanner effectively. You can configure this screen according to your needs, and can also set a custom text and an image that suits your use case.
loading...
User guidance
Text elements like the on-screen user guidance can be adapted in form and color.
loading...
Top bar
You can choose how to display the top bar in your app: hidden, solid or gradient.
![]()
loading...
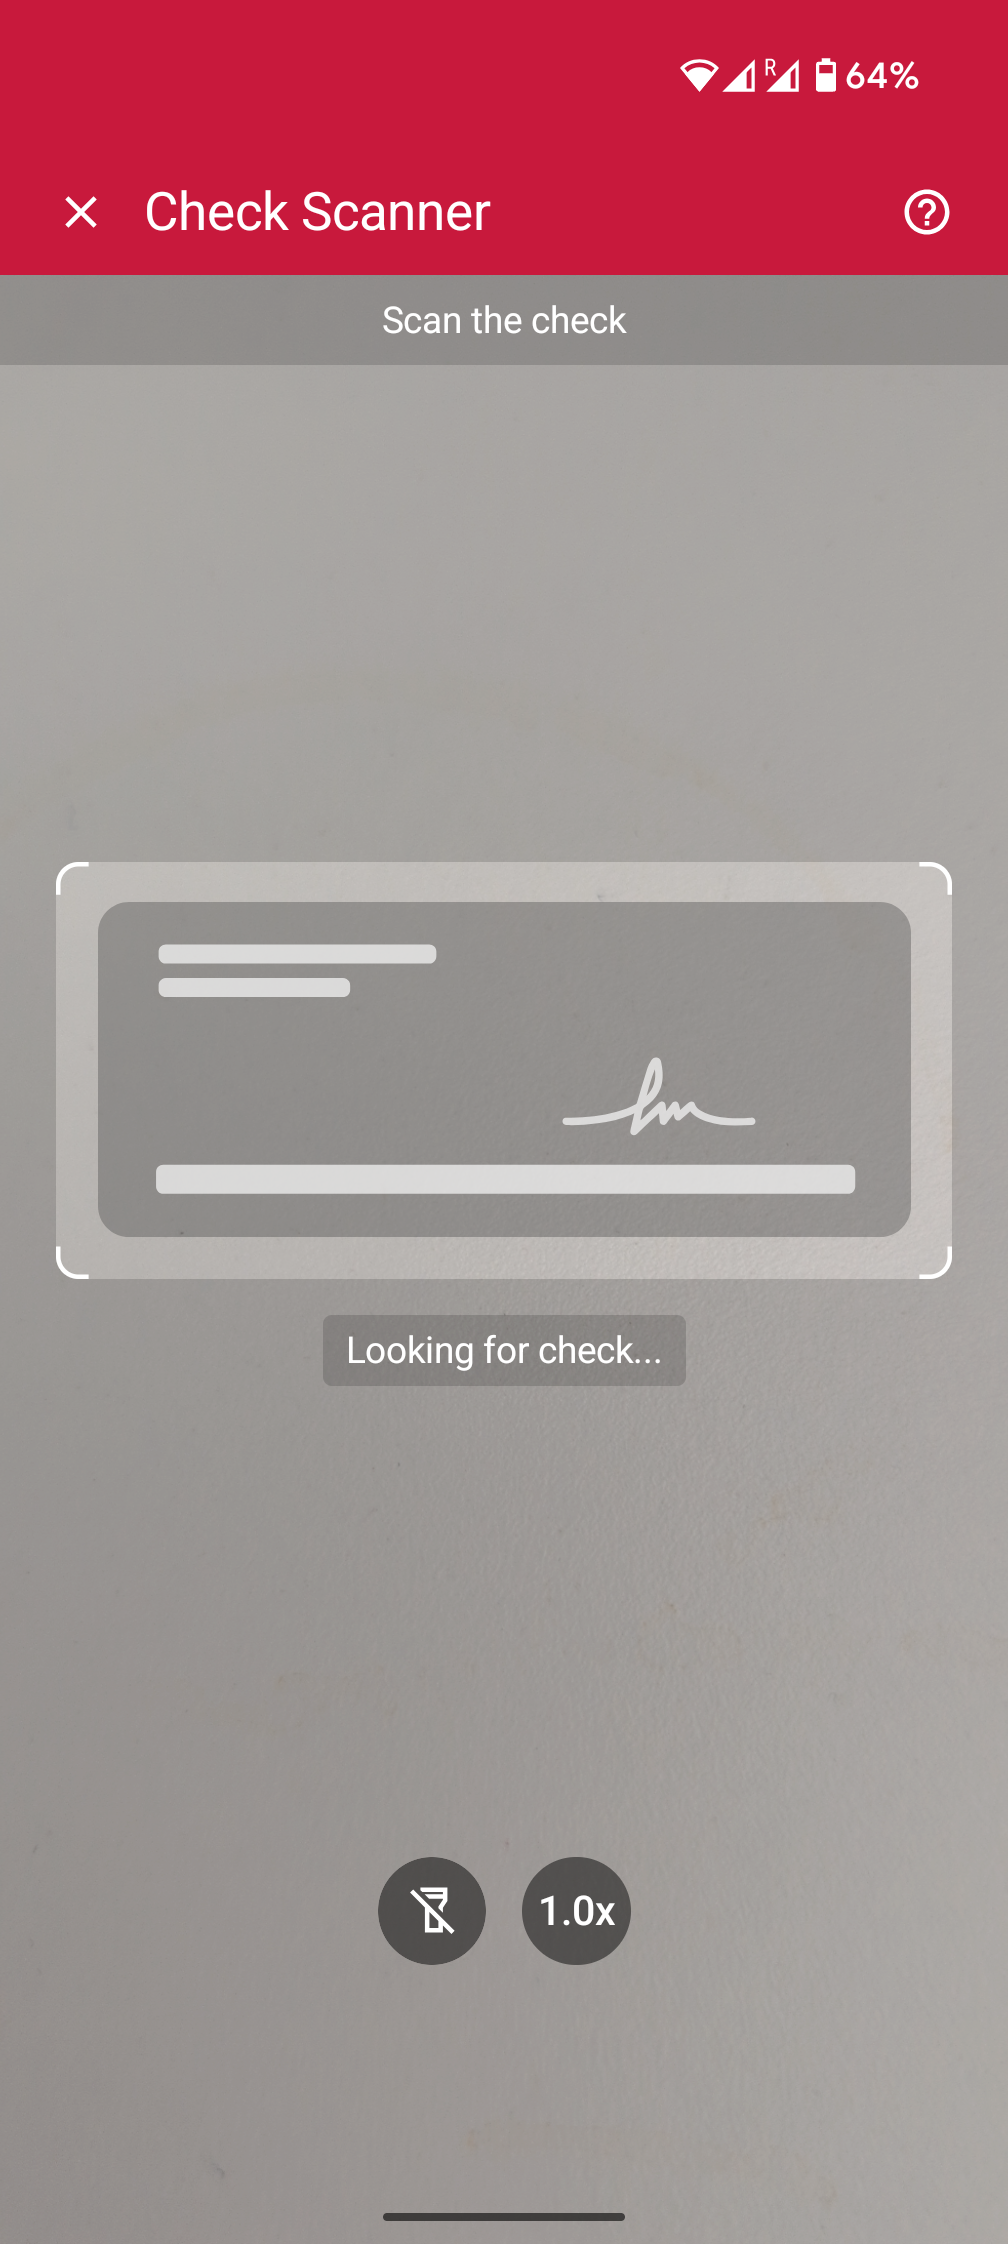
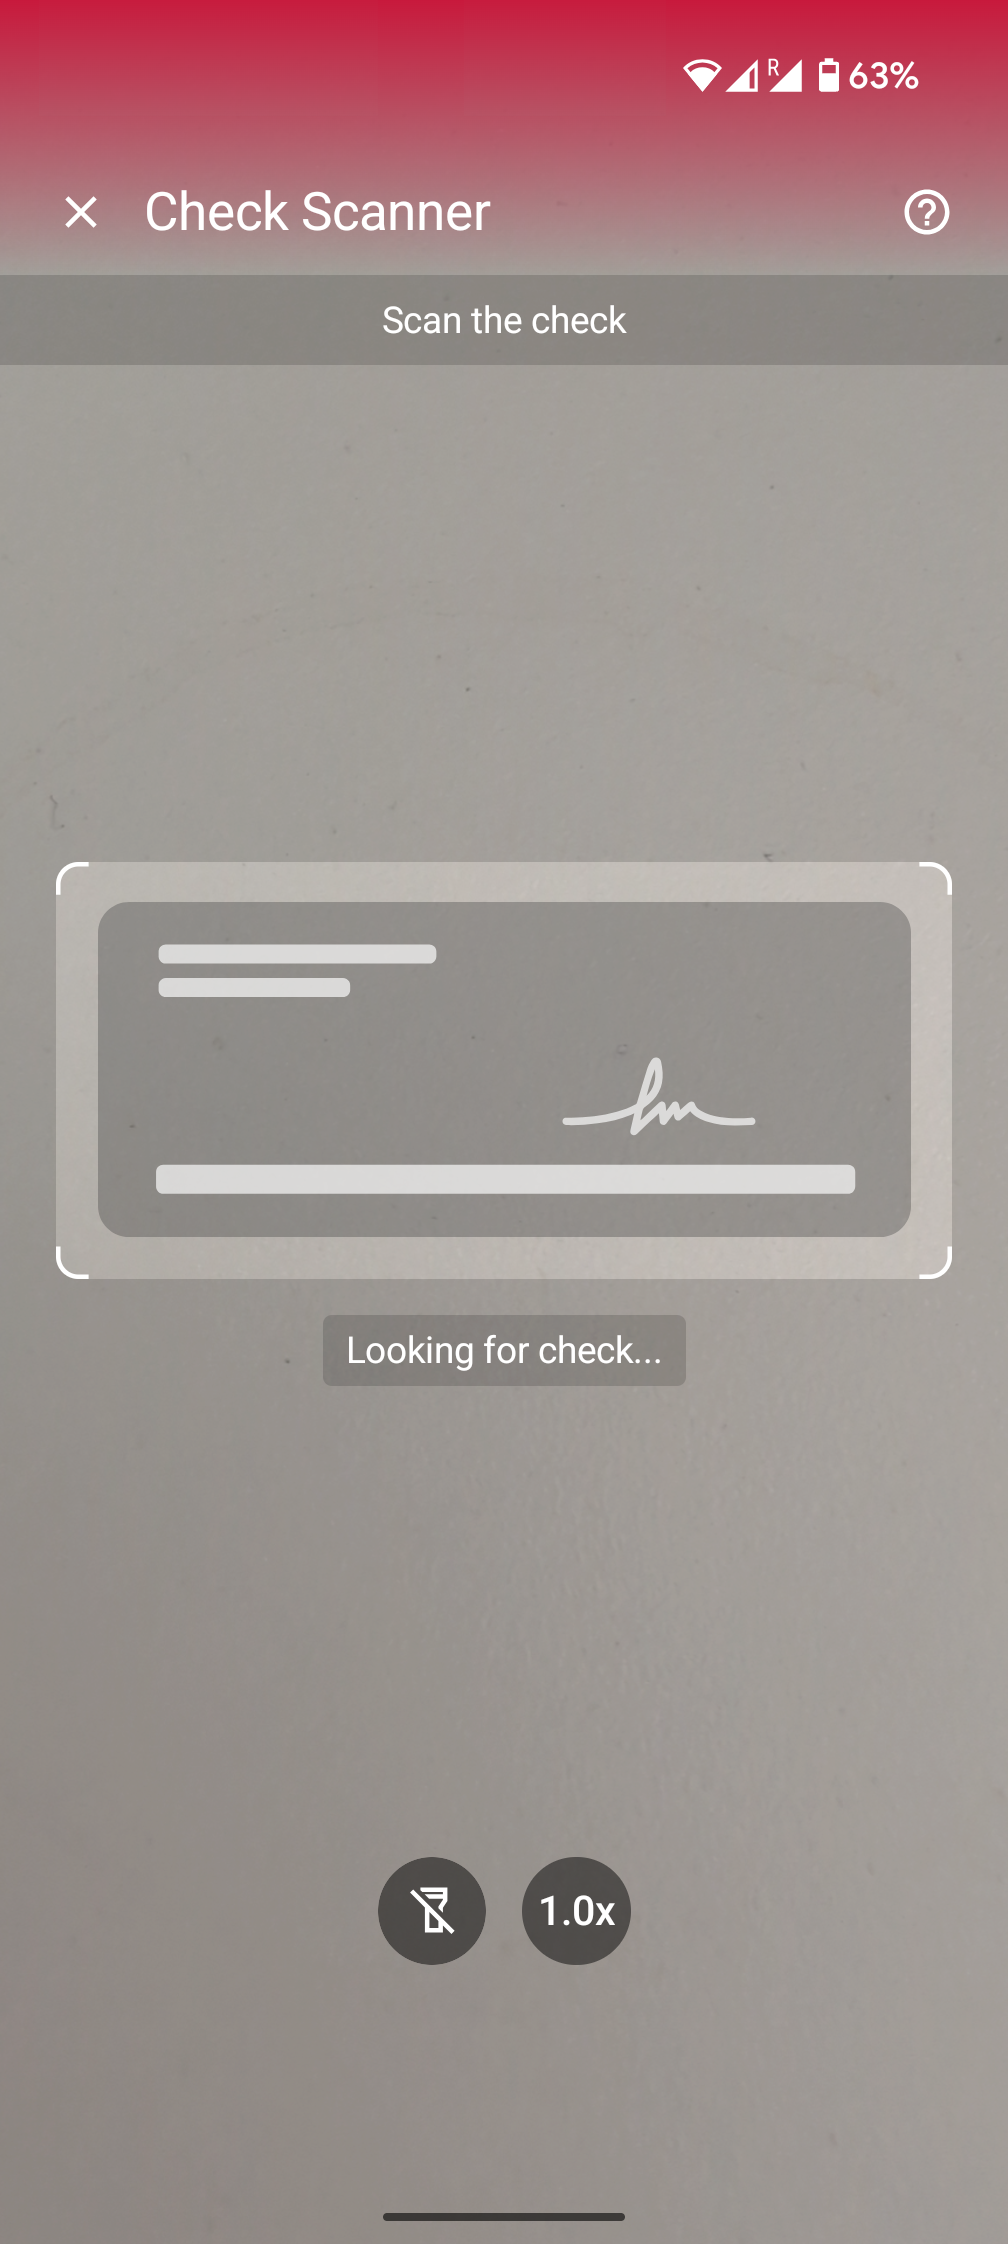
Finder overlay
You can change the finder overlay's color, dimensions, and user guidance text.
loading...
Action bar
The RTU UI's action bar component includes flashlight and zoom buttons, which you can freely customize or hide.

loading...
Scanning
The following is an example to configure some of the general and behavioral settings to tailor the overall scanning experience.
loading...
Integration with Jetpack Compose
The RTU UI is also available natively for Jetpack Compose using CheckScannerView. The following example demonstrates how to integrate the RTU UI Jetpack Compose view into a Custom Activity or any other Compose Flow.
loading...
Want to scan longer than one minute?
Generate a free trial license to test the Scanbot SDK thoroughly.
Get free trial licenseScanbot SDK is part of the Apryse SDK product family
A mobile scan is just the start. With Apryse SDKs, you can expand mobile workflows into full cross‑platform document processing. Whether you need to edit PDFs, add secure digital signatures, or use a fast, customizable document viewer and editor, Apryse gives you the tools to build powerful features quickly.
Learn more