AR Overlay
Introduction
The Barcode AR Overlay can be enabled to display and select recognized barcodes in an augmented-reality fashion. Each recognized barcode will be highlighted by a colored frame and text. Tapping on a barcode will deliver the barcode scanning result to the delegate of the barcode scanner. These tapped/delivered barcodes can be highlighted with a different color. The displayed text is customizable.
The Barcode AR Overlay is available for the Classic UI Barcode Scanner as well as for the RTU UI Barcode Scanner.
Use cases
Displaying an extra layer of information in the live view is useful for a range of scanning use cases. Here are five barcode scanning use cases supporting the AR Overlay:
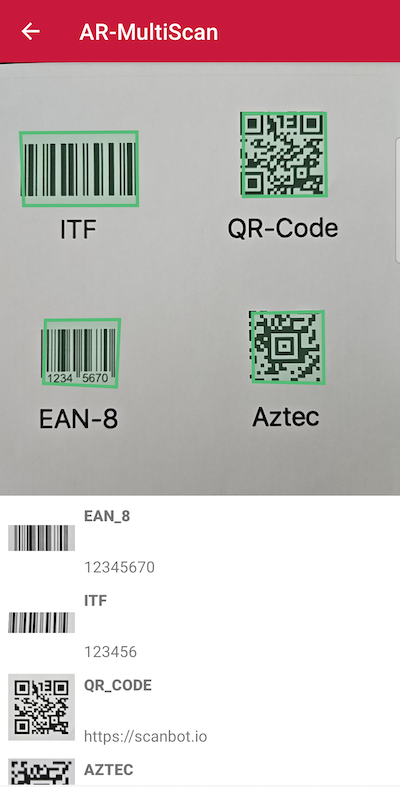
- AR-MultiScan: Quickly scan multiple barcodes in one go, highlighting scanned codes.
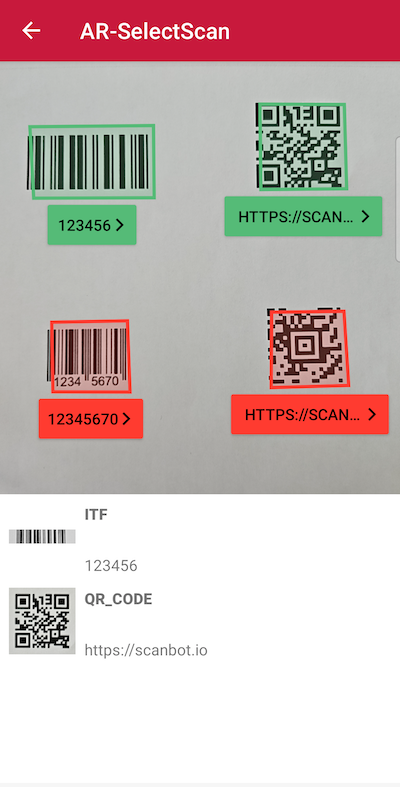
- AR-SelectScan: Selectively capture barcodes by tapping them.
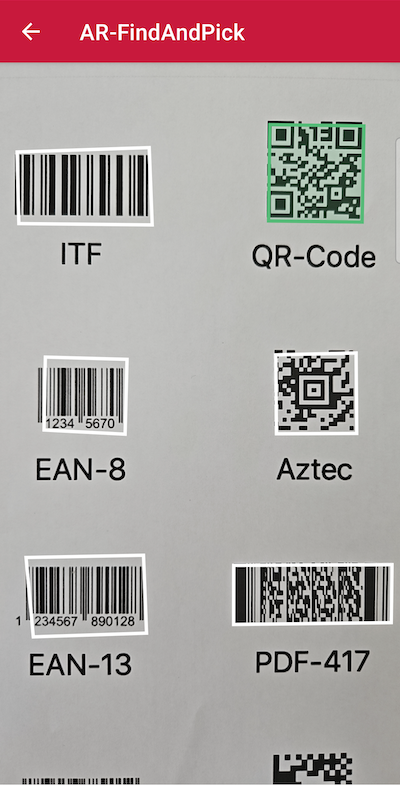
- AR-FindAndPick: Locate specific items with a pre-defined barcode value in a large inventory.
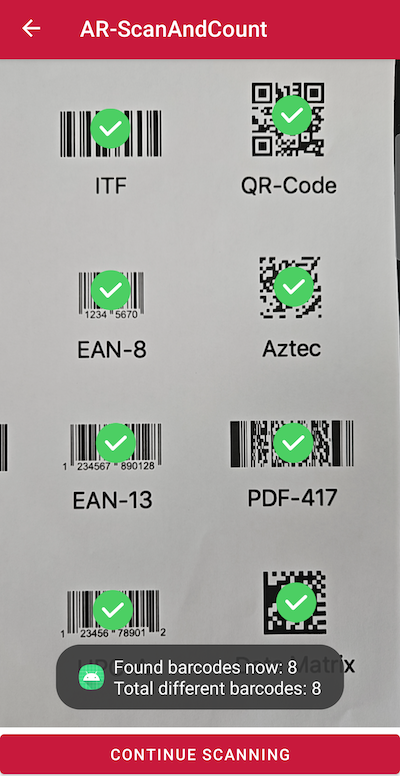
- AR-ScanAndCount: Count items by scanning their barcodes.
The following use cases have been compiled into a dedicated example app. Too see the complete source code of the code snippets provided here, check out the example app on GitHub.
AR-MultiScan
The MultiScan functionality allows users to hover over multiple barcodes in live view. As a barcode comes into view, it is instantly detected, highlighted with a floating AR overlay, and scanned. This feature is especially useful in scenarios in which users must quickly scan multiple barcodes and manually selecting each one would be too slow.
For example, in a warehouse setting where an employee needs to scan a variety of items in quick succession, MultiScan can speed up the process. The worker simply points their device at the products and each barcode is automatically detected and scanned, with the AR overlay providing visual feedback and confirming successful scans.

loading...
AR-SelectScan
The SelectScan feature allows the user to hover over multiple barcodes in live view, detecting and marking them with an AR overlay. However, instead of automatically scanning every barcode, users must tap the marked barcode to scan them individually. Scanned barcodes are highlighted (i.e., with an overlay in a different color) and marked as scanned. SelectScan is handy when you want to enable users to pick specific barcodes from a group of items.
For example, consider a delivery driver with multiple packages on his truck. He needs to scan and deliver only one or a select few of the loaded packages. All barcodes on the packages are detected and marked as they come into the live view, but only the manually selected ones are actually scanned.

loading...
AR-FindAndPick
The FindAndPick feature allows you to pre-define one or more desired barcode values. When users hover over different items in live view, only the pre-defined items are highlighted and selected. Items that do not match the value are marked as mismatching, for example by a differently colored overlay. This feature is ideal for finding specific items in a large inventory.
Consider a situation in a large car parts store. An employee can use FindAndPick to quickly locate a specific part requested by a customer. They pre-define the part's barcode so that the system can automatically highlight the desired item among dozens – saving the employee valuable time.

loading...
AR-ScanAndCount
The ScanAndCount feature offers the ability to hover over multiple barcodes in live view, scanning each detected barcode and keeping a count of the scanned items. This functionality can be customized to detect only a particular barcode type or a pre-defined list of barcodes. As you hover over the barcodes, the correct ones are checked off from the list, and those not on the list are flagged.
Consider a retail setting. During stocktaking, a worker can use ScanAndCount to verify the number of a particular product on the shelves. Alternatively, the worker can scan the items at hand based on a pre-defined list and thus check for completeness.

loading...
AR Overlay UI components
The section above provides some concrete use cases for the AR Overlay, accompanied by code snippets from a dedicated example app. This should allow you to get your first prototype up and running quickly.
However, when creating your own solution, you can take advantage of the Ready-to-Use Barcode Scanner components of the Scanbot SDK or its Classic Components. The Ready-To-Use UI (RTU UI) components offer a suite of straightforward, customizable high-level components designed for common tasks. On the other hand, Classic Components provide the flexibility to build fully personalized UI components.
Ready-To-Use UI Components
The capabilities of the AR Overlay and how to configure it for the RTU UI Barcode Scanner are covered in the RTU UI Use Cases section.
Classic Components
BarcodeScannerView allows for enabling a Barcode Selection Overlay that displays a contour of the barcode in front of the camera preview (AR-like). It is possible to customize the polygon itself and also the view shown below the barcode contour.
To enable barcode selection overlay, the following functions are required:
loading...
Set appearance configuration:
loading...
Scan And Count
Scan And Count allows you to effortlessly capture 1D and 2D barcodes with a single tap.
You can scan multiple codes per scan, and scan as many times as you want.
The scanner automatically tracks the number of times each code has been detected over multiple scans.
These codes are stored as an array in the countedBarcodes property.
The Scan And Count feature can be integrated into the application using Classic UI components.
loading...
To get all scanned barcodes and their count for the whole session:
loading...
Set appearance configuration:
loading...
Want to scan longer than one minute?
Generate a free trial license to test the Scanbot SDK thoroughly.
Get your free Trial LicenseWhat do you think of this documentation?
What can we do to improve it? Please be as detailed as you like.