Classic UI
Classic SDK Components
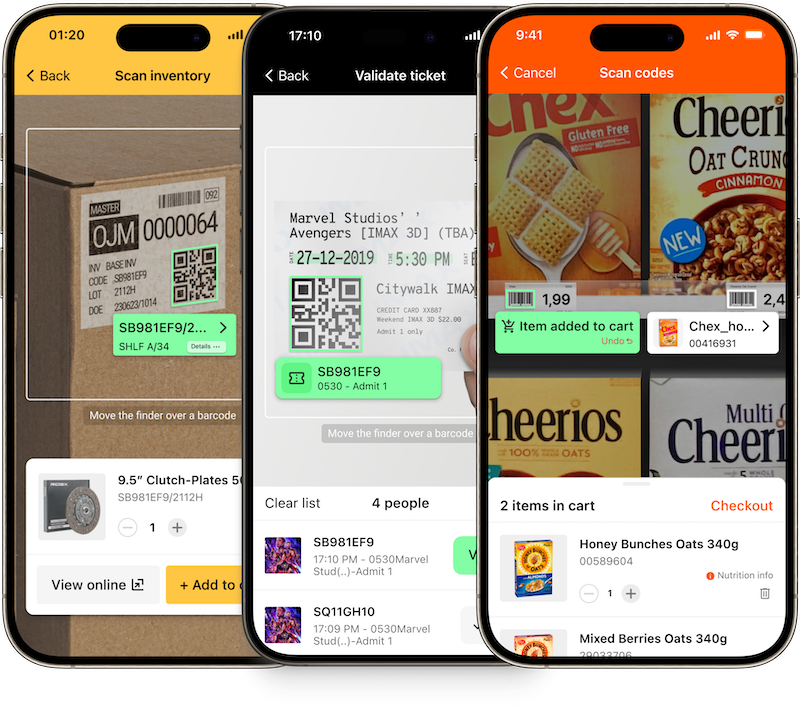
Our Classic UI Components allow you to build your own flexible and fully customizable UI components. These building blocks are easy to integrate and customize and can be used in your Activities to implement barcode scanning functionalities.
Classic UI components require more effort during integration compared to Ready-to-Use UI Components, but allow you to fully customize the UI and its behavior.
Integration of Classic SDK Components
Use the class BarcodeScannerView, which encapsulates the Barcode Scanning feature in one UI component. When using the BarcodeScannerView component, it is not required to work directly with the camera view or to set up a finder view separately. Simply follow the steps below and you are ready to go.
To start using the barcode feature, add the following view into your layout xml:
    <io.scanbot.sdk.barcode.ui.BarcodeScannerView
        android:id="@+id/barcode_scanner_view"
        android:layout_width="match_parent"
        android:layout_height="match_parent" />
Then configure the view using the following calls:
loading...
Delegate the methods onResume and onPause in your Activity class (or Fragment) to BarcodeScannerView:
loading...
It is possible to configure the finder view using the following commands:
loading...
You may also configure the camera or the behavior of the scanner using the corresponding configuration controllers:
loading...
Classic components: alternative approach
Instead of using a single BarcodeScannerView, you can achieve a higher degree of flexibility by using the classes ScanbotCameraXView, BarcodeDetectorFrameHandler, ScanbotBarcodeDetector, BarcodeScannerConfig and BarcodeAutoSnappingController to build a custom scanner UI for barcode and QR code scanning.
ScanbotCameraXView
The Android camera API can be very tricky and is far from developer-friendly (in fact, very far).
To help you avoid the same issues we encountered, we created the ScanbotCameraXView while developing the Scanbot SDK.
Adding it to your layout is as simple as:
    <io.scanbot.sdk.ui.camera.ScanbotCameraXView
        android:id="@+id/camera"
        android:layout_width="match_parent"
        android:layout_height="match_parent" />
That's it! You can start your app and should see the camera preview.
Preview mode
The ScanbotCameraXView supports 2 preview modes:
CameraPreviewMode.FIT_IN- in this mode, the camera preview frames will be scaled to the layout view size. The full preview frame content will be visible, but unused edges can appear in the preview layout.CameraPreviewMode.FILL_IN- in this mode, the camera preview frames fill the layout view. The preview frames may contain additional content at the edges that is not visible in the preview layout.
By default, ScanbotCameraXView uses FILL_IN mode. You can change it using the cameraView.setPreviewMode(mode: CameraPreviewMode) method.
Autofocus sound and shutter sound
You can enable/disable system shutter sounds using setters in ScanbotCameraXView.
loading...
cameraView.setShutterSound(boolean enabled) sets the camera shutter sound state. The default is true, which means the camera plays the system-defined camera shutter sound when takePicture() is called.
Note that devices may not always allow disabling the camera shutter sound. If the shutter sound state cannot be set to the desired value, this method will be ignored. https://developer.android.com/reference/android/hardware/Camera.html#enableShutterSound(boolean)
Continuous-focus mode
For most use cases, it is recommended to enable the "Continuous-focus mode" of the Camera. Use the continuousFocus() method of ScanbotCameraXView for this. It should be called from the main thread and only when the camera is opened (CameraOpenCallback):
loading...
Please note: The continuous-focus mode will be automatically disabled
- after the
autoFocusmethod call, - after a tap on the
ScanbotCameraXViewto perform the autoFocus, - or after the
takePictureevent.
In these cases, you have to call the continuousFocus() method again to re-enable the continuous-focus mode.
Orientation lock
By default, the ScanbotCameraXView will create pictures with their orientation (portrait or landscape) based on the current device orientation.
It is important to understand that the orientation of the taken picture is independent of the locked-orientation mode
of the Activity!
For example: If you just lock the Activity to portrait mode, the orientation of the taken image will still be
based on the current device orientation!
To apply a real orientation lock in ScanbotCameraXView, you can use the following methods:
cameraView.lockToLandscape(boolean lockPicture) or cameraView.lockToPortrait(boolean lockPicture) to lock
the Activity and the taken picture to a desired orientation:
loading...
User Guidance
To improve both the end user's experience and scanning quality you can add visual guidance to the scanning UI.
This will help the user understand the desired positioning, orientation, and size of the scanned document or the QR/barcodes in the camera preview and take care of the preliminary processing to improve the results.
General idea
In your layout put your finder view on top of ScanbotCameraXView within the same parent, and specify its id
to ScanbotCameraXView using app:finder_view_id="@id/my_finder_view_id" attribute:
<io.scanbot.sdk.ui.camera.ScanbotCameraXView
    android:id="@+id/cameraView"
    android:layout_width="match_parent"
    android:layout_height="match_parent"
    app:finder_view_id="@id/my_finder_view_id" />

<io.scanbot.sdk.ui.camera.FinderOverlayView
    android:id="@+id/my_finder_view_id"
    android:layout_width="match_parent"
    android:layout_height="match_parent" />
Alternatively, you can just set id as android:id="@+id/finder_overlay" for your finder view and ScanbotCameraXView
will find it automatically.
Please note the following limitations when using finder view:
- the parent view should not have any padding.
ScanbotCameraXViewshould haveandroid:layout_width="match_parent"andandroid:layout_height="match_parent"layout parameters and no padding or margins; - the "Finder Overlay" view can have any margins, size, background or even child views, but it should always be over
the camera preview frame, otherwise it will throw an
IllegalStateException.
Not only will this direct the user's scanning process, but also the FrameHandler (attached to the given ScanbotCameraXView)
will receive a non-null FrameHandler.Frame.finderRect object that will represent the frame area within the view
finder's bounds. That can later be used, for example, for other SDK components that accept finder rect.
To start with: bare android.view.View (full customization)
In case you want full control over the look and feel of the view finder - you can use any android.view.View subclass
as a finder view. Take this example:
<io.scanbot.sdk.ui.camera.ScanbotCameraXView
    android:id="@+id/camera_view"
    android:layout_width="match_parent"
    android:layout_height="match_parent"
    app:finder_view_id="@id/my_finder_view" />

<View
    android:id="@+id/my_finder_view"
    android:layout_width="match_parent"
    android:layout_height="100dp"
    android:layout_gravity="bottom"
    android:layout_marginLeft="20dp"
    android:layout_marginRight="20dp"
    android:layout_marginBottom="200dp"
    android:background="@drawable/finder_view_container_bg" />
where @drawable/finder_view_container_bg is your xml-drawable with bounds outline. The result might look like this:
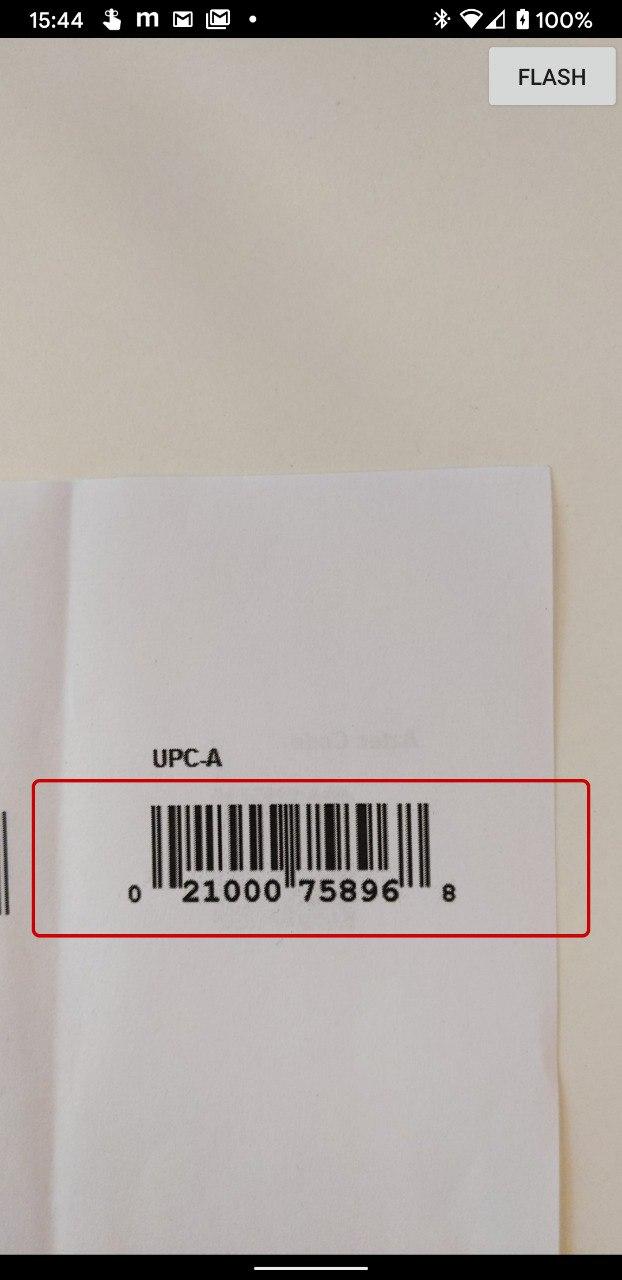 .
.
FinderOverlayView - ready-to-use solution
Instead of plain android.view.View you can use our specially made FinderOverlayView class. It handles all the hassle
and leaves you with just a little bit of styling. Take this example:
<io.scanbot.sdk.ui.camera.ScanbotCameraXView
    android:id="@+id/camera_view"
    android:layout_width="match_parent"
    android:layout_height="match_parent"
    app:finder_view_id="@id/my_finder_view"/>

<io.scanbot.sdk.ui.camera.FinderOverlayView
    android:id="@+id/my_finder_view"
    android:layout_width="match_parent"
    android:layout_height="match_parent"/>
This component allows the following customizations:
overlay_color- the color of the area outside the finder view gapoverlay_stroke_color- the color of the finder view borderstroke_width- the width of the finder view bordersbsdk_corner_radius- the radius for rounded corners of the finder view bordermin_padding- the minimum space between the finder view and the screen bordersfixed_width- the finder view's fixed widthfixed_height- the finder view's fixed heightmax_size- maximum size of the longer side, when fixed sizes are not set
Alternatively, if you do not want to specify a fixed width and height, you can programmatically set the desired finder view aspect ratio. It will then take all the available screen space, respecting given aspect ratio and padding:
val requiredPageAspectRatios = listOf(FinderAspectRatio(21.0, 29.7)) // ~ A4 page size

...

val finderOverlayView = findViewById<FinderOverlayView>(R.id.finder_overlay_view)
finderOverlayView.setRequiredAspectRatios(requiredPageAspectRatios)
The result might look like this:
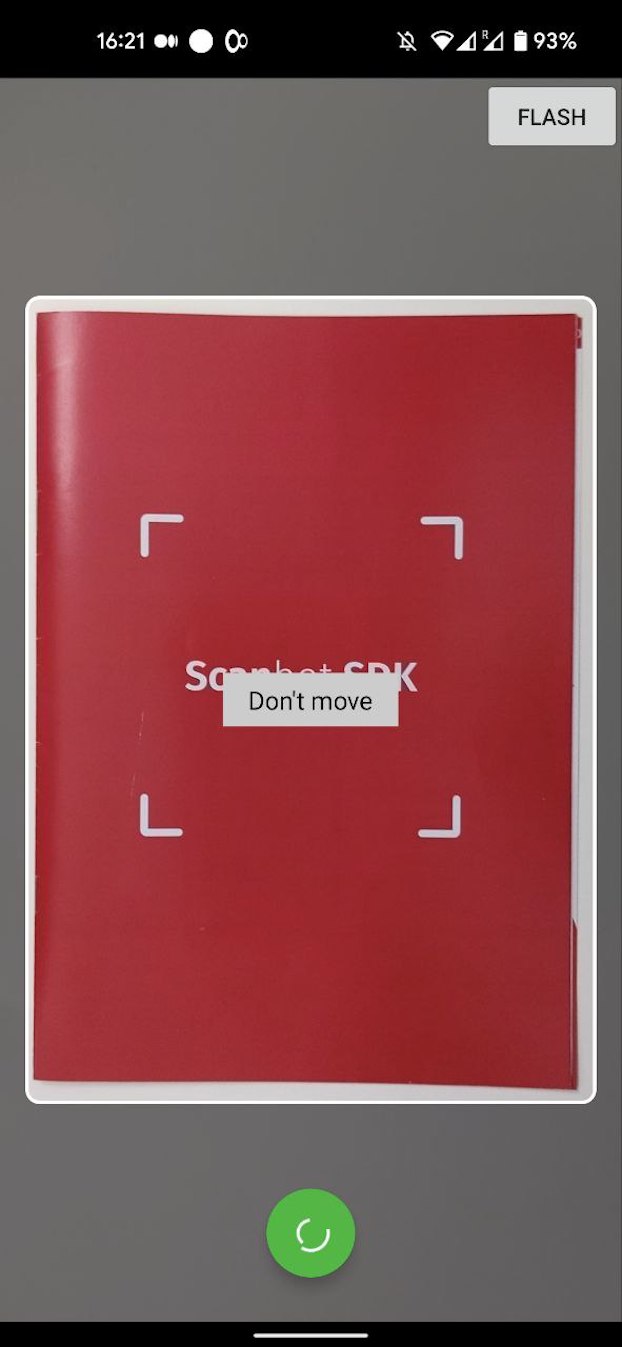 .
.
To set the padding from the edge of the preview (this means that the padding will not be calculated from the edge of the screen,
but rather from the edge of the preview itself), use finderInsets API.
Check both CameraPreviewMode.FIT_IN and CameraPreviewMode.FILL_IN to see the difference.
To set all insets:
val finderOverlayView = findViewById<FinderOverlayView>(R.id.finder_overlay_view)
finderOverlayView.finderInsets = Insets.of(50, 200, 50, 0)
...
To set one inset:
val finderOverlayView = findViewById<FinderOverlayView>(R.id.finder_overlay_view)
finderOverlayView.setFinderInset(right=50)
...
There is also an option to create a safe area for the finder. This means that if some part of the preview is in this area, the finder will be moved out of this zone. For example, you can set the top safe area inset as the height of the toolbar to prevent your finder appearing behind the toolbar, even if the camera and finder layouts are placed behind the toolbar in the view stack.
To set all safe area insets:
val finderOverlayView = findViewById<FinderOverlayView>(R.id.finder_overlay_view)
finderOverlayView.safeAreaInsets = Insets.of(0, 200, 0, 0)
...
To set one safe area inset:
val finderOverlayView = findViewById<FinderOverlayView>(R.id.finder_overlay_view)
finderOverlayView.setSafeAreaInsets(top=200)
...
AdaptiveFinderOverlayView - for range of desired aspect ratios
In case you are scanning different documents with different acceptable aspect ratios, but still want to preserve the
logic of having a pre-selected rectangle of the document - you might use AdaptiveFinderOverlayView.
Take this example:
<io.scanbot.sdk.ui.camera.ScanbotCameraXView
    android:id="@+id/camera_view"
    android:layout_width="match_parent"
    android:layout_height="match_parent"
    app:finder_view_id="@id/my_finder_view"/>

<io.scanbot.sdk.ui.camera.AdaptiveFinderOverlayView
    android:id="@+id/my_finder_view"
    android:layout_width="match_parent"
    android:layout_height="match_parent"/>
AdaptiveFinderOverlayView uses ContourDetectorFrameHandler in its logic, so we also need to set that up:
val cameraView = findViewById<ScanbotCameraXView>(R.id.camera_view)
val finderOverlayView = findViewById<AdaptiveFinderOverlayView>(R.id.my_finder_view)

// we can use several aspect ratios:
val pageAspectRatios = listOf( // this will be used for ContourDetectorFrameHandler
        PageAspectRatio(21.0, 29.7), // a4 sheet size
        PageAspectRatio(85.60, 53.98)) // credit card size
val finderAspectRatios = pageAspectRatios.toFinderAspectRatios() // for AdaptiveFinderOverlayView
myFinderOverlayView.setRequiredAspectRatios(finderAspectRatios)

val contourDetectorFrameHandler = ContourDetectorFrameHandler.attach(cameraView, scanbotSDK.createContourDetector())
contourDetectorFrameHandler.setRequiredAspectRatios(pageAspectRatios)
contourDetectorFrameHandler.addResultHandler(finderOverlayView.contourDetectorFrameHandler)
Now during live detection the finder view will adjust its borders to a detected document if it complies to one of the aspect ratios set.
Inserting views into finder sections
It is now possible to correctly layout some content within the finder. Both AdaptiveFinderOverlayView
and FinderOverlayView have 3 sections where it is possible to insert a view. All inserted views can be matched to the size of the section, so it is possible to build custom constraints inside each of them.
For this we need to place your view in xml with a special id.
First, just add it to the view hierarchy as you would do with any other finder view mentioned above:
- finder_top_placeholder - for a container that will be placed above the finder frame.
- finder_center_placeholder - for a container that will be placed inside the finder frame.
- finder_bottom_placeholder - for a container that will be placed below the finder frame.
<io.scanbot.sdk.ui.camera.ScanbotCameraXView
        android:id="@+id/cameraView"
        android:layout_width="match_parent"
        android:layout_height="match_parent"/>

<io.scanbot.sdk.ui.camera.FinderOverlayView
    android:id="@+id/my_finder_view"
    android:layout_width="match_parent"
    android:layout_height="match_parent">

<androidx.constraintlayout.widget.ConstraintLayout
    android:id="@+id/finder_top_placeholder"
    android:layout_width="match_parent"
    android:layout_height="match_parent"/>

<androidx.constraintlayout.widget.ConstraintLayout
    android:id="@+id/finder_center_placeholder"
    android:layout_width="match_parent"
    android:layout_height="match_parent"/>

<androidx.constraintlayout.widget.ConstraintLayout
    android:id="@+id/finder_bottom_placeholder"
    android:layout_width="match_parent"
    android:layout_height="match_parent"/>

</io.scanbot.sdk.ui.camera.FinderOverlayView>
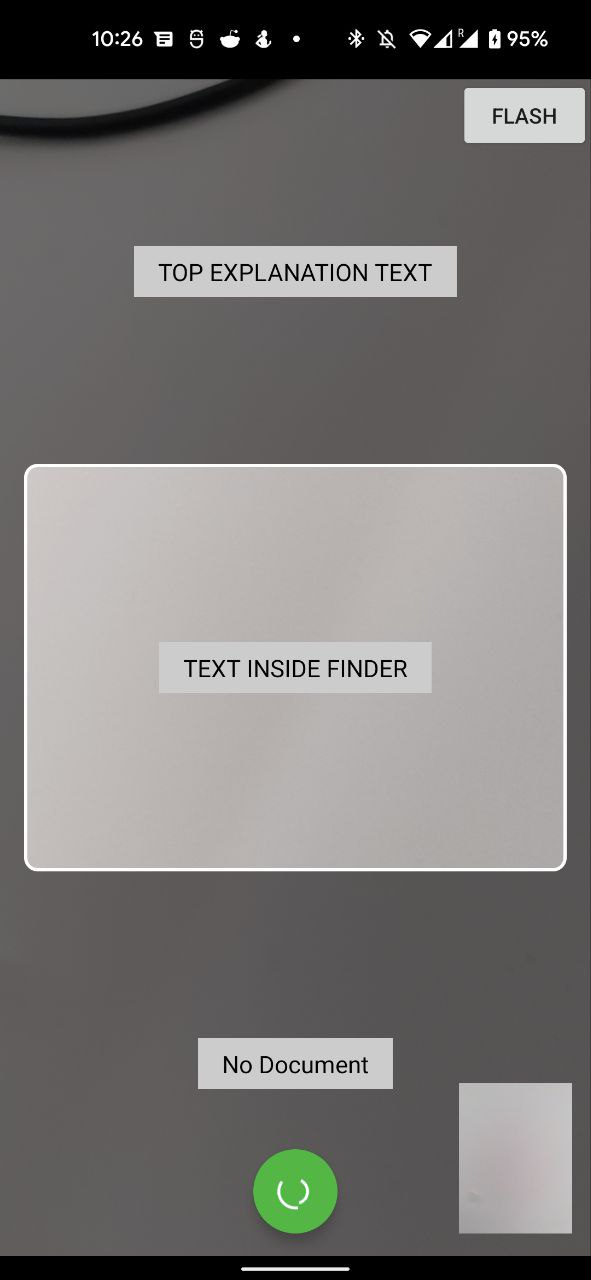 .
.
It is also possible to add views programmatically by calling:
finderOverlayView.addTopPlaceholder(view)
finderOverlayView.addBottomPlaceholder(view)
finderOverlayView.addFinderPlaceholder(view)
Main configuration
The Scanbot SDK provides the ability to modify the default configuration of ScanbotBarcodeScanner.
There are 2 ways of doing this - simplified and advanced.
Here is an example of a simple configuration modification:
loading...
It allows in simple straightforward way to set barcodeFormats, extractedDocumentFormats and onlyAcceptDocuments parameters.
For more detailed configuration you can use the advanced way:
loading...
The parameters currently available in BarcodeScannerConfiguration are:
barcodeFormatConfigurations: List of options for barcode decoding. Default isBarcodeFormats.common.extractedDocumentFormats: List of document formats to be extracted. Barcodes that decode to one of the extracted document formats will have extractedDocument field in BarcodeItem populated with the parsed document. By default all supported barcode document formats are accepted. If empty, no barcodes will be parsed into documents.onlyAcceptDocuments: If true and acceptedDocumentFormats is not empty, then barcodes that don't decode to one of the accepted document formats will be ignored. Default is false.returnBarcodeImage: If true, the barcode image will be returned in the BarcodeItem. Default is true.engineMode: The engine mode for barcode scanning. Default isBarcodeScannerEngineMode.NEXT_GEN.live: If true, the barcode scanning will be performed in live mode. Default is true.
This way allows you to specify common configuration (BarcodeFormatCommonConfiguration) which will be applied to all Barcode formats, as well as specific configuration for each specific barcode format or group of formats.
Group configs:
BarcodeFormatCommonConfigurationBarcodeFormatCommonOneDConfigurationBarcodeFormatCommonTwoDConfigurationBarcodeFormatCommonFourStateConfiguration
Barcode format specific configs:
BarcodeFormatAustraliaPostConfigurationBarcodeFormatJapanPostConfigurationBarcodeFormatRoyalMailConfigurationBarcodeFormatRoyalTntPostConfigurationBarcodeFormatUspsIntelligentMailConfigurationBarcodeFormatPharmaCodeTwoTrackConfigurationBarcodeFormatGs1CompositeConfigurationBarcodeFormatMsiPlesseyConfigurationBarcodeFormatCode11ConfigurationBarcodeFormatCode2Of5ConfigurationBarcodeFormatCodabarConfigurationBarcodeFormatCode39ConfigurationBarcodeFormatCode93ConfigurationBarcodeFormatCode128ConfigurationBarcodeFormatDataBarConfigurationBarcodeFormatDataBarExpandedConfigurationBarcodeFormatDataBarLimitedConfigurationBarcodeFormatItfConfigurationBarcodeFormatUpcEanConfigurationBarcodeFormatPharmaCodeConfigurationBarcodeFormatAztecConfigurationBarcodeFormatQrCodeConfigurationBarcodeFormatPdf417ConfigurationBarcodeFormatMicroPdf417ConfigurationBarcodeFormatDataMatrixConfigurationBarcodeFormatMaxiCodeConfiguration
Common configuration
Some peculiar use cases require special handling. For example, it's possible to configure ScanbotBarcodeDetector to scan only barcodes of pre-defined lengths. This might reduce the number false scans. Such parameters work only for enumerated types of barcodes and usually you don't need to modify their default values.
Users can specify these parameters via the BarcodeFormatCommonConfiguration entity as a part of BarcodeScannerConfig:
loading...
The parameters currently available in BarcodeFormatCommonConfiguration are:
regexFilter: Regular expression filter for barcode text. If the barcode text does not match the regular expression, it will not be scanned. The default is an empty string (setting is turned off). Default is "".minimumSizeScore: Minimum acceptable value of a result BarcodeItem's sizeScore (between 0 and 1). Barcodes with a sizeScore less than this value will not be scanned. When set to 0, barcodes are returned no matter what their size is. Default is 0.addAdditionalQuietZone: If true, we process the barcode scanning with an artificial quiet zone that we add to the input image. This flag should be used to scan sharp crops of a barcode. Default is false.minimum1DQuietZoneSize: Minimum quiet zone size on the left and right sides of a 1D barcode, measured in number of modules. Default is 6.stripCheckDigits: If true, the check digits are stripped from the result. Default is false.minimumTextLength: Minimum text length. Applied only to linear barcode formats that allow variable length. Default is 1.maximumTextLength: Maximum text length. 0 implies no maximum. Applied only to linear barcode formats that allow variable length. Default is 0.gs1Handling: GS1 message handling options. Default isGs1Handling.PARSE.strictMode: If true, the barcode scanner will only return barcodes that pass the strict validation checks according to standards to avoid false positives. Default is true.formats: List of barcode formats to scan. By default, the most commonly used formats are enabled.
Full example of a custom activity
As a final step, you have to connect the ScanbotCameraXView with BarcodeDetectorFrameHandler and BarcodeAutoSnappingController.
The ScanbotBarcodeDetector can be used to detect and parse barcodes from still images (Bitmap),
e.g. JPG files from the device's photo gallery or other sources.
You can refer to an example implementation of a fully customizable Activity in our demo:
Manual data parsing
For manually parsing document data encoded in a barcode into the formatted document, use BarcodeDocumentParser.
val scanbotSDK = ScanbotBarcodeScannerSDK(context);
scanbotSDK.createBarcodeDocumentParser().parseDocument(barcodeString)
Want to scan longer than one minute?
Generate a free trial license to test the Scanbot SDK thoroughly.
Get your free Trial LicenseWhat do you think of this documentation?
What can we do to improve it? Please be as detailed as you like.