Document Scanner UI Components | Android Document Scanner
Introduction
The Scanbot SDK comes with an essential camera view, additional views for extending the camera functionality and a set of the frame handler and detector classes that handle all the camera and detection implementation details for you. It provides a UI for document scanning guidance as well as a UI and functionality for manual and automatic shutter release.
The ScanbotCameraXView provides fully customizable camera controls and features.
Furthermore, ContourDetectorFrameHandler gives control over how and when frames are analyzed.
And, most importantly, ContourDetector and ImageProcessor perform document detection, perspective correction, cropping and filtering of the document images.
Integration
There are two ways to integrate the component into the application:
Ready-To-Use UI component (more about RTU UI)
Classic UI component (more about Classic UI)
ScanbotCameraXView(more details are here)PolygonView(more details are here)ShutterButtonDocumentAutoSnappingController(more details are here)ContourDetectorFrameHandler(more details are here)ContourDetector(more details are here)FinderOverlayView/AdaptiveFinderOverlayView/ZoomFinderOverlayView(more details are here)
Take a look at our Example Apps to see how to integrate the Document Scanner.
- Ready-To-Use UI: ready-to-use-ui-demo
- Classic UI Components: camera-view
Add Feature as a Dependency
The Document Scanner is available with SDK Package 1. You have to add the following dependency for it:
implementation("io.scanbot:sdk-package-1:$latestSdkVersion")
Initialize the SDK
The Scanbot SDK must be initialized before use. Add the following code snippet to your Application class:
import io.scanbot.sdk.ScanbotSDKInitializer

class ExampleApplication : Application() {

    override fun onCreate() {
        super.onCreate()

        // Initialize the Scanbot Scanner SDK:
        ScanbotSDKInitializer().initialize(this)
    }
}
Unfortunately, we have noticed that all devices using a Cortex A53 processor DO NOT SUPPORT GPU acceleration. If you encounter any problems, please disable GPU acceleration for these devices.
ScanbotSDKInitializer()
        .allowGpuAcceleration(false)
Ready-To-Use Ui Component
The Scanbot SDK provides an Activity that handles all the camera and detection implementation details for you. It provides a UI for document scanning guidance as well as a UI and functionality for manual and automatic shutter release.

Ready-To-Use UI Component (activity) that is responsible for scanning documents is DocumentScannerActivity.
Have a look at our end-to-end working example of the RTU components usage here.
Starting and configuring RTU document scanner
To start the RTU document scanner you only have to start a new activity and be ready to process its result later.
Starting from version 1.90.0, the SDK RTU components contain predefined AndroidX Result API contracts. They handle part of the boilerplate for starting the RTU activity component and mapping the result once it finishes.
If your code is bundled with Android's deprecated startActivityForResult API - check the other approach we offer for this case.
- AndroidX Result API
- old 'startActivityForResult' approach
val documentScannerResult: ActivityResultLauncher<DocumentScannerConfiguration>

...

documentScannerResult =
    activity.registerForActivityResultOk(DocumentScannerActivity.ResultContract()) { result ->
        if (result.resultOk) {
            val snappedPages: List<Page>? = result.result
            // here you can add your logic to show or process the snapped pages
        }
    }

...

myButton.setOnClickListener {
   val cameraConfiguration = DocumentScannerConfiguration()
   documentScannerResult.launch(cameraConfiguration)
}
myButton.setOnClickListener {
    val cameraConfiguration = DocumentScannerConfiguration()
    val intent = DocumentScannerActivity.newIntent(this@MainActivity, cameraConfiguration)
    startActivityForResult(intent, DOCUMENT_SCANNER_REQUEST_CODE_CONSTANT)
}
override fun onActivityResult(requestCode: Int, resultCode: Int, data: Intent?) {
    super.onActivityResult(requestCode, resultCode, data)

    if (requestCode == DOCUMENT_SCANNER_REQUEST_CODE_CONSTANT) {
        val result: Result = DocumentScannerActivity.extractResult(resultCode, data)
        if (result.resultOk) {
            val snappedPages: List<Page>? = result.result
            // here you can add your logic to show or process the snapped pages
        }
    }
}
We offer some syntactic sugar for handling the result from RTU components via AndroidX Result API:
every RTU component's activity contains a
Resultclass which, in turn, along with theresultCodevalue exposes a BooleanresultOkproperty. This will be true ifresultCodeequalsActivity.RESULT_OK;when you only expect
Activity.RESULT_OKresult code - you can use theAppCompatActivity.registerForActivityResultOkextension method instead ofregisterForActivityResult- it will be triggered only when there is a non-nullable result entity present.
Always use the corresponding activity's static newIntent method to create intent when starting the RTU UI activity using deprecated startActivityForResult approach. Creating android.content.Intent object using its constructor (passing the activity's class as a parameter) will lead to the RTU UI component malfunctioning.
An instance of DocumentScannerConfiguration is required for starting the RTU UI activity. It allows configuration changes through methods it exposes:
val cameraConfiguration = DocumentScannerConfiguration()
cameraConfiguration.setCameraPreviewMode(CameraPreviewMode.FIT_IN)
cameraConfiguration.setIgnoreBadAspectRatio(true)
cameraConfiguration.setBottomBarBackgroundColor(ContextCompat.getColor(this, R.color.colorPrimaryDark))
cameraConfiguration.setBottomBarButtonsColor(ContextCompat.getColor(this, R.color.greyColor))
cameraConfiguration.setTopBarButtonsActiveColor(ContextCompat.getColor(this, android.R.color.white))
cameraConfiguration.setCameraBackgroundColor(ContextCompat.getColor(this, R.color.colorPrimary))
cameraConfiguration.setUserGuidanceBackgroundColor(ContextCompat.getColor(this, android.R.color.black))
cameraConfiguration.setUserGuidanceTextColor(ContextCompat.getColor(this, android.R.color.white))
cameraConfiguration.setMultiPageEnabled(true)
cameraConfiguration.setAutoSnappingSensitivity(0.75f)
cameraConfiguration.setPageCounterButtonTitle("%d Page(s)")
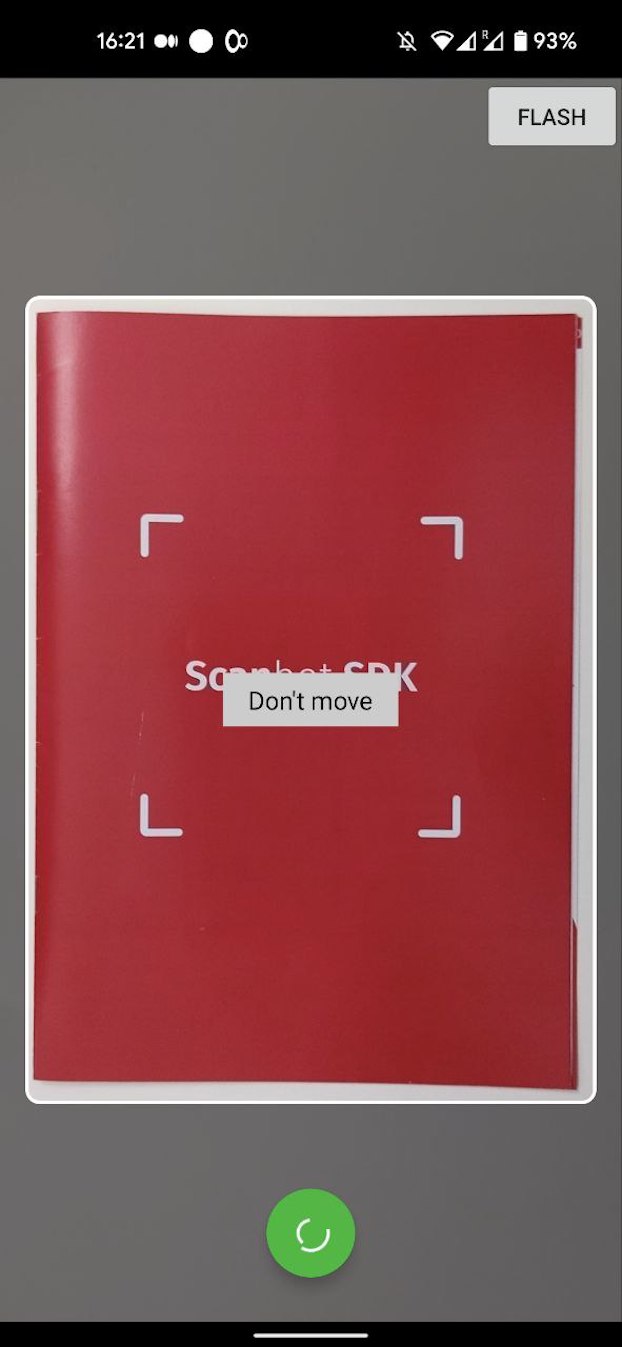
cameraConfiguration.setTextHintOK("Don't move.\nCapturing document...")
All parameters in DocumentScannerConfiguration are optional.
Full API references for these methods can be found on this page.
Handling the result
DocumentScannerActivity returns a list of the snapped and stored pages (Page class) as the result.
Information about access to the Page storage resources (original, cropped and filtered images and previews) is available here.
Information about Page processing is available here.
Information about correct handling of Page image files to keep disk usage optimal is available here.
Accessibility customization
Document Scanner provides an ability to customize Text resources for the accessibility feature.
Users can set a custom configuration DocumentScannerAccessibilityConfiguration in DocumentScannerConfiguration.
Here is an example:
val cameraConfiguration = DocumentScannerConfiguration()

cameraConfiguration.setAccessibilityConfiguration(
    DocumentScannerAccessibilityConfiguration(
        flashButtonAccessibilityLabel = "Flash button",
        flashButtonAccessibilityHint = "Change flash state",
        multiPageButtonAccessibilityLabel = "Multi page button",
        multiPageButtonAccessibilityHint = "Change multi page state",
        autoSnappingButtonAccessibilityLabel = "Auto snapping button",
        autoSnappingButtonAccessibilityHint = "Change auto snapping state",
        cancelButtonAccessibilityLabel = "Cancel button",
        cancelButtonAccessibilityHint = "Go back to the previous screen",
        pageCounterButtonAccessibilityLabel = "Page counter %d",
        pageCounterAccessibilityHint = "Press to go to the results screen",
        shutterButtonAccessibilityLabel = "Shutter button",
        shutterButtonAccessibilityHint = "Press to take a snap"
    )
)
Starting and configuring RTU finder document scanner
To start the RTU document scanner with finder instead of polygon you only have to start a new activity and be ready to process its result later.
Starting from version 1.90.0, the SDK RTU components contain predefined AndroidX Result API contracts. They handle part of the boilerplate for starting the RTU activity component and mapping the result once it finishes.
If your code is bundled with Android's deprecated startActivityForResult API - check the other approach we offer for this case.
- AndroidX Result API
- old 'startActivityForResult' approach
val finderDocumentScannerResultLauncher: ActivityResultLauncher<FinderDocumentScannerConfiguration>

...

    finderDocumentScannerResultLauncher =
            registerForActivityResultOk(FinderDocumentScannerActivity.ResultContract()) { resultEntity ->
                PageRepository.addPages(listOf(resultEntity.result!!))

                val intent = Intent(this, PagePreviewActivity::class.java)
                startActivity(intent)
            }

...

myButton.setOnClickListener {
   // Customize text resources, behavior and UI:
   val cameraConfiguration = FinderDocumentScannerConfiguration()
   finderDocumentScannerResultLauncher.launch(cameraConfiguration)
}
myButton.setOnClickListener {
    val cameraConfiguration = FinderDocumentScannerConfiguration()
    val intent = FinderDocumentScannerActivity.newIntent(this@MainActivity, cameraConfiguration)
    startActivityForResult(intent, DOCUMENT_SCANNER_REQUEST_CODE_CONSTANT)
}
override fun onActivityResult(requestCode: Int, resultCode: Int, data: Intent?) {
    super.onActivityResult(requestCode, resultCode, data)

    if (requestCode == DOCUMENT_SCANNER_REQUEST_CODE_CONSTANT) {
        val result: Result = DocumentScannerActivity.extractResult(resultCode, data)
        if (result.resultOk) {
            val snappedPage: Page? = result.result
            // here you can add your logic to show or process the snapped pages
        }
    }
}
We offer some syntactic sugar for handling the result from RTU components via AndroidX Result API:
every RTU component's activity contains a
Resultclass which, in turn, along with theresultCodevalue exposes a BooleanresultOkproperty. This will be true ifresultCodeequalsActivity.RESULT_OK;when you only expect
Activity.RESULT_OKresult code - you can use theAppCompatActivity.registerForActivityResultOkextension method instead ofregisterForActivityResult- it will be triggered only when there is a non-nullable result entity present.
Always use the corresponding activity's static newIntent method to create intent when starting the RTU UI activity using deprecated startActivityForResult approach. Creating android.content.Intent object using its constructor (passing the activity's class as a parameter) will lead to the RTU UI component malfunctioning.
An instance of FinderDocumentScannerConfiguration is required for starting the RTU UI activity. It allows configuration changes through methods it exposes:
val cameraConfiguration = FinderDocumentScannerConfiguration()
cameraConfiguration.setCameraPreviewMode(CameraPreviewMode.FIT_IN)
cameraConfiguration.setIgnoreBadAspectRatio(true)
cameraConfiguration.setTopBarButtonsActiveColor(ContextCompat.getColor(this, android.R.color.white))
cameraConfiguration.setCameraBackgroundColor(ContextCompat.getColor(this, R.color.colorPrimary))
cameraConfiguration.setUserGuidanceBackgroundColor(ContextCompat.getColor(this, android.R.color.black))
cameraConfiguration.setUserGuidanceTextColor(ContextCompat.getColor(this, android.R.color.white))
cameraConfiguration.setAutoSnappingSensitivity(0.75f)
cameraConfiguration.setTextHintOK("Don't move.\nCapturing document...")
// see further customization configs ...
All parameters in FinderDocumentScannerConfiguration are optional.
Full API references for these methods can be found on this page.
Handling the result
FinderDocumentScannerActivity returns a list of the snapped and stored pages (Page class) as the result.
Information about access to the Page storage resources (original, cropped and filtered images and previews) is available here.
Information about Page processing is available here.
Information about correct handling of Page image files to keep disk usage optimal is available here.
Accessibility customization
Finder Document Scanner provides an ability to customize Text resources for the accessibility feature.
Users can set a custom configuration FinderDocumentScannerAccessibilityConfiguration in FinderDocumentScannerConfiguration.
Here is an example:
val cameraConfiguration = FinderDocumentScannerConfiguration()

cameraConfiguration.setAccessibilityConfiguration(
    FinderDocumentScannerAccessibilityConfiguration(
        flashButtonAccessibilityLabel = "Flash button",
        flashButtonAccessibilityHint = "Change flash state",
        cancelButtonAccessibilityLabel = "Cancel button",
        cancelButtonAccessibilityHint = "Go back to the previous screen",
        shutterButtonAccessibilityLabel = "Shutter button",
        shutterButtonAccessibilityHint = "Press to take a snap"
    )
)
Force-closing an RTU UI screen from the calling code
All the RTU UI activities support the possibility to be finished from the application code.
// Starting the activity
val intent = CroppingActivity.newIntent(
        applicationContext,
        CroppingConfiguration()
)
startActivityForResult(intent, CROP_DEFAULT_UI_REQUEST_CODE)
...
// When it is needed to close the Activity from outside, call the following method:
CroppingActivity.forceClose(context)
Some activities, for example DocumentScannerActivity and BatchBarcodeScannerActivity, also support the possibility to keep the accumulated result after force-closing. It is then possible to process the result in onActivityResult. The only requirement is to set the keepResult parameter to true.
// Call this method to force-close DocumentScannerActivity and keep the result
DocumentScannerActivity.forceClose(context, true)
Using CameraX in RTU UI components
Starting from Scanbot SDK 1.88.0 it is possible to use the CameraX library inside the RTU UI components.
The CameraX-based solution may work better on some devices, however some parts of this library are still in the Alpha stage.
This option can only be set globally for all the features and is available in ScanbotSDKInitializer. Use the following code snippet to enable it:
ScanbotSDKInitializer()
        // ...
        .useCameraXRtuUi(true)
        .initialize(this)
Classic Components
The Android camera API might seem very tricky and far from being developer-friendly (in fact, very far). To help you avoid the same issues which we have encountered while developing the Scanbot SDK, we created the ScanbotCameraXView.
Getting Started
First of all, you have to add the SDK package and feature dependencies as described in the begining.
Then initialize the SDK.
ScanbotCameraView is available with SDK Package 1. Based on camera V1 old api implementation. This component is now deprecated by us and will be removed in the future.
ScanbotCameraXView is also available with SDK Package 1. Based on Android CameraX (api V2) implementation.
To get started, you have to undertake 3 steps.
First: Add this permission to the AndroidManifest.xml
<uses-permission android:name="android.permission.CAMERA" />
Second: Add ScanbotCameraXView to your layout, which is as simple as:
<io.scanbot.sdk.ui.camera.ScanbotCameraXView
        android:id="@+id/camera"
        android:layout_width="match_parent"
        android:layout_height="match_parent" />
Third: Delegate onResume and onPause methods of your Activity (or Fragment, whatever you are using) to ScanbotCameraView (ScanbotCameraXView does not need this as it is bound to a lifecycle):
class MyActivity : Activity() {

    ...

    override fun onResume() {
        super.onResume()
        scanbotCameraView.onResume()
    }

    override fun onPause() {
        scanbotCameraView.onPause()
        super.onPause()
    }
}
You can start your app, and you should see the camera preview.
Preview Mode
The ScanbotCameraXView supports 2 preview modes:
CameraPreviewMode.FIT_IN- in this mode the camera preview frames will be downscaled to the layout view size. Full preview frame content will be visible, but unused edges might appear in the preview layout.CameraPreviewMode.FILL_IN- in this mode the camera preview frames fill the layout view. The preview frames may contain additional content at the edges that is not visible in the preview layout.
By default, ScanbotCameraXView uses FILL_IN mode. You can change it using the cameraView.setPreviewMode(CameraPreviewMode.FIT_IN) method.
Auto-focus Sound and Shutter Sound
You can enable/disable auto-focus sounds and/or shutter sounds using setters in ScanbotCameraXView.
cameraView.setCameraOpenCallback(object : CameraOpenCallback {
    override fun onCameraOpened() {
        cameraView.postDelayed({
            cameraView.setAutoFocusSound(false)
            cameraView.setShutterSound(false)
        }, 700)
    }
})
cameraView.setShutterSound(boolean enabled) sets the camera shutter sound state. By default - true, the camera plays the system-defined camera shutter sound when takePicture() is called.
Note that devices may not always allow disabling the camera shutter sound. If the shutter sound state cannot be set to the desired value, this method will be ignored (link).
Continuous Focus Mode
For most use cases it is recommended to enable the "Continuous Focus Mode" of the Camera. Use the continuousFocus() method of ScanbotCameraXView for this. It should be called from the main thread and only when the camera is opened (CameraOpenCallback):
cameraView.setCameraOpenCallback(object : CameraOpenCallback {
    override fun onCameraOpened() {
        cameraView.postDelayed({
            cameraView.continuousFocus()
        }, 700)
    }
})
Please note: The Continuous Focus Mode will be automatically disabled after:
autoFocusmethod call;- a tap on the
ScanbotCameraXViewto perform auto focus; takePictureevent.
In these cases you have to call the continuousFocus() method again to re-enable the Continuous Focus Mode.
Example for the takePicture event, handled in the onPictureTaken(..) method of PictureCallback:
override fun onPictureTaken(image: ByteArray, captureInfo: CaptureInfo) {
    // image processing ...
    // ...

    cameraView.post {
        cameraView.continuousFocus()
        cameraView.startPreview()
    }
}
Auto Focus Troubleshooting
If there is a case where the camera snaps a document (barcode, etc) before auto focus has ended properly, consider checking the delayAfterFocusComplete property of the camera view to make the camera wait before snapping after the core component has been notified that auto focus has ended.
Orientation Lock
By default the ScanbotCameraXView will create pictures with their orientation based on the current device orientation. It is important to understand that the orientation of the taken picture is independent of the locked orientation mode of the Activity!
For example: if you just lock the Activity to portrait mode, the orientation of the taken image will still be based on the current device orientation!
Since version 1.31.1 the Scanbot SDK provides the functionality to apply a real orientation lock in ScanbotCameraXView. You can use the new methods cameraView.lockToLandscape(lockPicture: Boolean) or cameraView.lockToPortrait(lockPicture: Boolean) to lock the Activity and the taken picture to a desired orientation.
Front Facing Camera
The Scanbot SDK provides an ability to set up a front facing camera as a source for the preview content.
To enable it you have to set a front facing camera mode with the method setCameraModule(cameraModule: CameraModule) in ScanbotCameraXView. By default - CameraModule.BACK.
Possible options here include:
CameraModule.BACK- the default back facing camera will be used.CameraModule.FRONT- the default front facing camera will be used. The visual preview on the screen and buffer byte array in allFrameHandlers will be mirrored, but snapped pictures will be in their original state.
ScanbotCameraXView also supports changing the camera module on runtime:
cameraView.setCameraModule(CameraModule.FRONT);
cameraView.restartPreview();
ScanbotCameraXView now only supports setting the camera module configuration before starting the camera preview! Due to legacy issues, it is not possible to change the camera module once the camera preview has started.
Advanced: Preview Size and Picture Size
By default the ScanbotCameraXView selects the best available picture size (resolution of the taken picture) and a suitable preview size (preview frames).
You can change these values using the setter methods of ScanbotCameraXView:
cameraView.setCameraOpenCallback {
    cameraView.stopPreview()

    val supportedPictureSizes = cameraView.supportedPictureSizes
    // For demo purposes we just take the first picture size from the supported list!
    cameraView.setPictureSize(supportedPictureSizes[0])

    val supportedPreviewSizes = cameraView.supportedPreviewSizes
    // For demo purposes we just take the first preview size from the supported list!
    cameraView.setPreviewFrameSize(supportedPreviewSizes[0])

    cameraView.startPreview()
}
Please take the following into account when changing these values: on most devices the aspect ratio of the camera sensor (camera picture) does not match the aspect ratio of the display.
Using the flashlight
It is possible to control the state of the camera's flashlight using the following method of ScanbotCameraXView:
cameraView.useFlash(enabled)
To get access to the current state of the flashlight use:
val state = cameraView.isFlashEnabled()
Detecting and drawing contours
After you have set up the ScanbotCameraXView the next logical step would be to start using contour detection and draw the results on the screen.
Contour detection
To start contour detection, you have to attach the ContourDetectorFrameHandler to the preview buffer:
val detector: ContourDetector = ScanbotSDK(context).createContourDetector()
val cameraView = findViewById<ScanbotCameraXView>(R.id.cameraView)

val frameHandler = ContourDetectorFrameHandler(context, detector)
cameraView.previewBuffer.addFrameHandler(frameHandler)
or even shorter
val detector: ContourDetector = ScanbotSDK(context).createContourDetector()
val frameHandler = ContourDetectorFrameHandler.attach(cameraView, detector)
At this point, the contour detection becomes active. Now all we have to do is wait for the results:
frameHandler.addResultHandler(ContourDetectorFrameHandler.ResultHandler { result ->
    when (result) {
        is FrameHandlerResult.Success -> {
            // handle result here result.value.detectionResult
        }
        is FrameHandlerResult.Failure -> {
            // there is a license problem that needs to be handled
        }
    }
    false
})
Contour detection parameters
You can easily control the contour detection sensitivity by modifying the optional parameters in ContourDetectorFrameHandler:
    val detector: ContourDetector = ScanbotSDK(context).createContourDetector()
    val frameHandler = ContourDetectorFrameHandler.attach(cameraView, detector)
    frameHandler.setAcceptedAngleScore(75.0)
    frameHandler.setAcceptedSizeScore(80.0)
setAcceptedAngleScore(acceptedAngleScore: Double) - set the minimum score in percentage (0 - 100) of the perspective distortion to accept a detected document. The default value is 75.0. You can set lower values to accept more perspective distortion.
Warning: Lower values can result in document images which are more blurred.
setAcceptedSizeScore(acceptedSizeScore : Double) - set the minimum size in percentage (0 - 100) of the screen size to accept a detected document. It is sufficient that either the height or the width match the score. The default value is 80.0.
Warning: Lower values can result in lower resolution document images.
Drawing detected contour
To draw the detected contour use PolygonView. First, add it as a sub-view of ScanbotCameraXView:
<io.scanbot.sdk.ui.camera.ScanbotCameraXView
    android:id="@+id/cameraView"
    android:layout_width="match_parent"
    android:layout_height="match_parent">

    <io.scanbot.sdk.ui.PolygonView
        android:id="@+id/polygonView"
        android:layout_width="match_parent"
        android:layout_height="match_parent"
        app:polygonStrokeWidth="8dp"
        app:polygonStrokeColor="#ffffff"
        app:polygonFillColor="#00ff00" />

</io.scanbot.sdk.ui.camera.ScanbotCameraXView>
Second, PolygonView should receive callbacks from ContourDetectorFrameHandler:
val polygonView = findViewById<PolygonView>(R.id.polygonView)
frameHandler.addResultHandler(polygonView.contourDetectorResultHandler)
Customizing drawn polygon
PolygonView supports the following attributes (which you can add in XML, as shown in the example above):
polygonStrokeWidth- the width (thickness) of the polygon linespolygonStrokeColor- the color of the polygon linespolygonFillColor- the fill color of the polygonpolygonStrokeColorOK- the color of the polygon lines when detection is successful (optional)polygonFillColorOK- the fill color of the polygon when detection is successful (optional)polygonAutoSnapStrokeWidth- the width of the autosnapping polygon progress indicator (default 3dp)polygonAutoSnappingProgressStrokeColor- the color of the autosnapping polygon progress indicator (default is white)polygonRoundedCornersRadius- the rounded corner radius of the polygon (0 by default)drawShadow- whether the polygon stroke should cast a shadow (since Android API v26) (default isfalse)
User Guidance
To improve both the end user's experience and scanning quality you can add visual guidance to the scanning UI.
This will help the user understand the desired positioning, orientation, and size of the scanned document or the QR/barcodes in the camera preview and take care of the preliminary processing to improve the results.
General idea
In your layout put your finder view on top of ScanbotCameraXView within the same parent, and specify its id
to ScanbotCameraXView using app:finder_view_id="@id/my_finder_view_id" attribute:
<io.scanbot.sdk.ui.camera.ScanbotCameraXView
    android:id="@+id/cameraView"
    android:layout_width="match_parent"
    android:layout_height="match_parent"
    app:finder_view_id="@id/my_finder_view_id" />

<io.scanbot.sdk.ui.camera.FinderOverlayView
    android:id="@+id/my_finder_view_id"
    android:layout_width="match_parent"
    android:layout_height="match_parent" />
Alternatively, you can just set id as android:id="@+id/finder_overlay" for your finder view and ScanbotCameraXView
will find it automatically.
Please note the following limitations when using finder view:
- the parent view should not have any padding.
ScanbotCameraXViewshould haveandroid:layout_width="match_parent"andandroid:layout_height="match_parent"layout parameters and no padding or margins; - the "Finder Overlay" view can have any margins, size, background or even child views, but it should always be over
the camera preview frame, otherwise it will throw an
IllegalStateException.
Not only will this direct the user's scanning process, but also the FrameHandler (attached to the given ScanbotCameraXView)
will receive a non-null FrameHandler.Frame.finderRect object that will represent the frame area within the view
finder's bounds. That can later be used, for example, for other SDK components that accept finder rect.
To start with: bare android.view.View (full customization)
In case you want full control over the look and feel of the view finder - you can use any android.view.View subclass
as a finder view. Take this example:
<io.scanbot.sdk.ui.camera.ScanbotCameraXView
    android:id="@+id/camera_view"
    android:layout_width="match_parent"
    android:layout_height="match_parent"
    app:finder_view_id="@id/my_finder_view" />

<View
    android:id="@+id/my_finder_view"
    android:layout_width="match_parent"
    android:layout_height="100dp"
    android:layout_gravity="bottom"
    android:layout_marginLeft="20dp"
    android:layout_marginRight="20dp"
    android:layout_marginBottom="200dp"
    android:background="@drawable/finder_view_container_bg" />
where @drawable/finder_view_container_bg is your xml-drawable with bounds outline. The result might look like this:
 .
.
FinderOverlayView - ready-to-use solution
Instead of plain android.view.View you can use our specially made FinderOverlayView class. It handles all the hassle
and leaves you with just a little bit of styling. Take this example:
<io.scanbot.sdk.ui.camera.ScanbotCameraXView
    android:id="@+id/camera_view"
    android:layout_width="match_parent"
    android:layout_height="match_parent"
    app:finder_view_id="@id/my_finder_view"/>

<io.scanbot.sdk.ui.camera.FinderOverlayView
    android:id="@+id/my_finder_view"
    android:layout_width="match_parent"
    android:layout_height="match_parent"/>
This component allows the following customizations:
overlay_color- the color of the area outside the finder view gapoverlay_stroke_color- the color of the finder view borderstroke_width- the width of the finder view bordersbsdk_corner_radius- the radius for rounded corners of the finder view bordermin_padding- the minimum space between the finder view and the screen bordersfixed_width- the finder view's fixed widthfixed_height- the finder view's fixed heightmax_size- maximum size of the longer side, when fixed sizes are not set
Alternatively, if you do not want to specify a fixed width and height, you can programmatically set the desired finder view aspect ratio. It will then take all the available screen space, respecting given aspect ratio and padding:
val requiredPageAspectRatios = listOf(FinderAspectRatio(21.0, 29.7)) // ~ A4 page size

...

val finderOverlayView = findViewById<FinderOverlayView>(R.id.finder_overlay_view)
finderOverlayView.setRequiredAspectRatios(requiredPageAspectRatios)
The result might look like this:
 .
.
To set the padding from the edge of the preview (this means that the padding will not be calculated from the edge of the screen,
but rather from the edge of the preview itself), use finderInsets API.
Check both CameraPreviewMode.FIT_IN and CameraPreviewMode.FILL_IN to see the difference.
To set all insets:
val finderOverlayView = findViewById<FinderOverlayView>(R.id.finder_overlay_view)
finderOverlayView.finderInsets = Insets.of(50, 200, 50, 0)
...
To set one inset:
val finderOverlayView = findViewById<FinderOverlayView>(R.id.finder_overlay_view)
finderOverlayView.setFinderInset(right=50)
...
There is also an option to create a safe area for the finder. This means that if some part of the preview is in this area, the finder will be moved out of this zone. For example, you can set the top safe area inset as the height of the toolbar to prevent your finder appearing behind the toolbar, even if the camera and finder layouts are placed behind the toolbar in the view stack.
To set all safe area insets:
val finderOverlayView = findViewById<FinderOverlayView>(R.id.finder_overlay_view)
finderOverlayView.safeAreaInsets = Insets.of(0, 200, 0, 0)
...
To set one safe area inset:
val finderOverlayView = findViewById<FinderOverlayView>(R.id.finder_overlay_view)
finderOverlayView.setSafeAreaInsets(top=200)
...
AdaptiveFinderOverlayView - for range of desired aspect ratios
In case you are scanning different documents with different acceptable aspect ratios, but still want to preserve the
logic of having a pre-selected rectangle of the document - you might use AdaptiveFinderOverlayView.
Take this example:
<io.scanbot.sdk.ui.camera.ScanbotCameraXView
    android:id="@+id/camera_view"
    android:layout_width="match_parent"
    android:layout_height="match_parent"
    app:finder_view_id="@id/my_finder_view"/>

<io.scanbot.sdk.ui.camera.AdaptiveFinderOverlayView
    android:id="@+id/my_finder_view"
    android:layout_width="match_parent"
    android:layout_height="match_parent"/>
AdaptiveFinderOverlayView uses ContourDetectorFrameHandler in its logic, so we also need to set that up:
val cameraView = findViewById<ScanbotCameraXView>(R.id.camera_view)
val finderOverlayView = findViewById<AdaptiveFinderOverlayView>(R.id.my_finder_view)

// we can use several aspect ratios:
val pageAspectRatios = listOf( // this will be used for ContourDetectorFrameHandler
        PageAspectRatio(21.0, 29.7), // a4 sheet size
        PageAspectRatio(85.60, 53.98)) // credit card size
val finderAspectRatios = pageAspectRatios.toFinderAspectRatios() // for AdaptiveFinderOverlayView
myFinderOverlayView.setRequiredAspectRatios(finderAspectRatios)

val contourDetectorFrameHandler = ContourDetectorFrameHandler.attach(cameraView, scanbotSDK.createContourDetector())
contourDetectorFrameHandler.setRequiredAspectRatios(pageAspectRatios)
contourDetectorFrameHandler.addResultHandler(finderOverlayView.contourDetectorFrameHandler)
Now during live detection the finder view will adjust its borders to a detected document if it complies to one of the aspect ratios set.
Inserting views into finder sections
It is now possible to correctly layout some content within the finder. Both AdaptiveFinderOverlayView
and FinderOverlayView have 3 sections where it is possible to insert a view. All inserted views can be matched to the size of the section, so it is possible to build custom constraints inside each of them.
For this we need to place your view in xml with a special id.
First, just add it to the view hierarchy as you would do with any other finder view mentioned above:
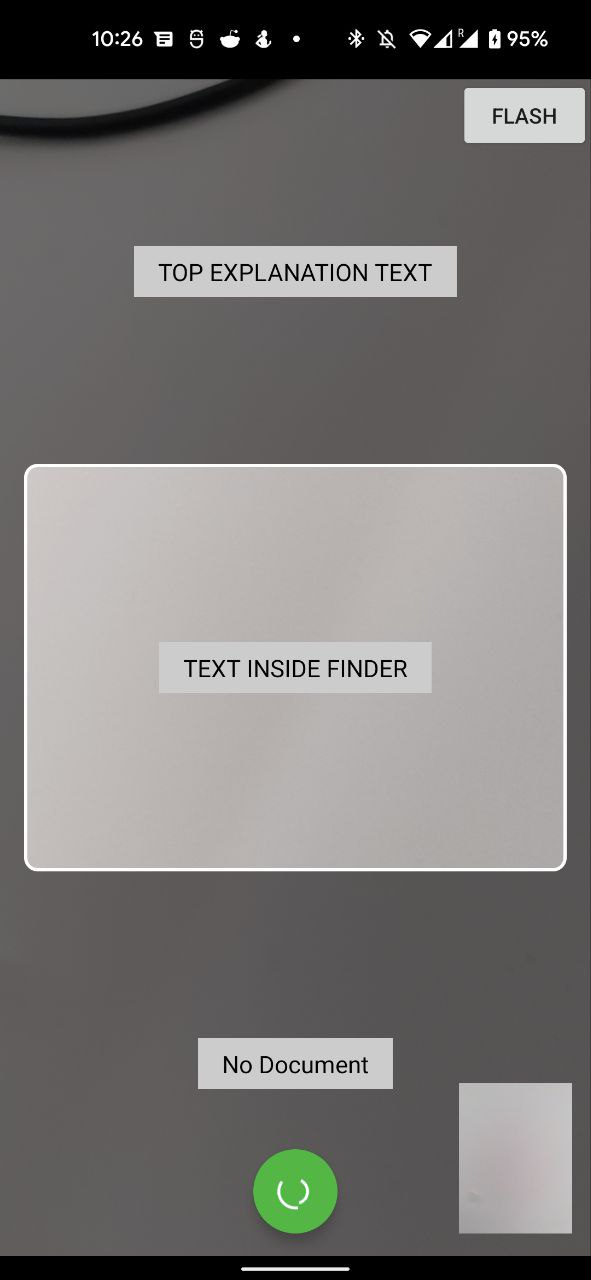
- finder_top_placeholder - for a container that will be placed above the finder frame.
- finder_center_placeholder - for a container that will be placed inside the finder frame.
- finder_bottom_placeholder - for a container that will be placed below the finder frame.
<io.scanbot.sdk.ui.camera.ScanbotCameraXView
        android:id="@+id/cameraView"
        android:layout_width="match_parent"
        android:layout_height="match_parent"/>

<io.scanbot.sdk.ui.camera.FinderOverlayView
    android:id="@+id/my_finder_view"
    android:layout_width="match_parent"
    android:layout_height="match_parent">

<androidx.constraintlayout.widget.ConstraintLayout
    android:id="@+id/finder_top_placeholder"
    android:layout_width="match_parent"
    android:layout_height="match_parent"/>

<androidx.constraintlayout.widget.ConstraintLayout
    android:id="@+id/finder_center_placeholder"
    android:layout_width="match_parent"
    android:layout_height="match_parent"/>

<androidx.constraintlayout.widget.ConstraintLayout
    android:id="@+id/finder_bottom_placeholder"
    android:layout_width="match_parent"
    android:layout_height="match_parent"/>

</io.scanbot.sdk.ui.camera.FinderOverlayView>
 .
.
It is also possible to add views programmatically by calling:
finderOverlayView.addTopPlaceholder(view)
finderOverlayView.addBottomPlaceholder(view)
finderOverlayView.addFinderPlaceholder(view)
Autosnapping
To further improve the user experience, you might want to automatically take a photo when a document is detected and conditions are good - we call this Auto Snapping.
How to use it
It is easy: just attach DocumentAutoSnappingController to the camera like in the following example:
val contourDetector = ScanbotSDK(context).createContourDetector()
val contourDetectorFrameHandler = ContourDetectorFrameHandler.attach(cameraView, contourDetector)
val autoSnappingController = DocumentAutoSnappingController.attach(cameraView, contourDetectorFrameHandler)
And you're done. Now the camera will automatically take photos when the underlying conditions are met.
Sensitivity
You can control the Auto Snapping speed by setting the sensitivity parameter in DocumentAutoSnappingController.
autoSnappingController.setSensitivity(1f)
Note: the higher the sensitivity, the faster the snap triggers. Sensitivity must be within [0..1] range. A value of 1.0 triggers snapping immediately, whereas a value of 0.0 delays the snapping by 3 seconds.
The default value is 0.66 (1 sec)
Autosnapping visualization
Scanbot SDK provides the functionality to visualize an auto snapping process. It is implemented with the io.scanbot.sdk.ui.PolygonView animation. To enable this animation user has to attach the PolygonView as a IAutoSnappingController.AutoSnappingStateListener to the DocumentAutoSnappingController (or to the GenericDocumentAutoSnappingController):
val autoSnappingController = DocumentAutoSnappingController.attach(scanbotCameraView, contourDetector)
autoSnappingController.stateListener = polygonView
PolygonView will start the animation as soon as a contour detector will return the detection status OK. And will finish it as soon as the snap will be triggered.
Handling contour detection results
You can handle the contour detection results using ContourDetectorFrameHandler#addResultHandler. It might be useful if you want to guide your user through the snapping process by, for instance, displaying respective icons and status messages.
contourDetectorFrameHandler.addResultHandler(ContourDetectorFrameHandler.ResultHandler { result ->
    when (result) {
        is FrameHandlerResult.Success -> {
            // handle result here result.value.detectionResult
        }
        is FrameHandlerResult.Failure -> {
           // there is a license problem that needs to be handled
        }
    }
    false
})
This callback is coming from the worker thread. You need to move execution to the main thread before updating the UI.
On each frame you will get a DetectedFrame object which contains the results of the contour detection. One of the most important fields here is detectionResult which is basically the status of the contour detection. Possible values for this status are:
OK- contour detection was successful. The detected contour looks like a valid document. This is a good time to take a picture.OK_BUT_TOO_SMALL- a document was detected, but it takes up too little of the camera viewport area. Quality can be improved by moving the camera closer to the document.OK_BUT_BAD_ANGLES- a document was detected, but the perspective is wrong (camera is tilted relative to the document). Quality can be improved by holding the camera directly over the document.OK_BUT_BAD_ASPECT_RATIO- a document was detected, but it has the wrong rotation relative to the camera sensor. Quality can be improved by rotating the camera by 90 degrees.OK_OFF_CENTER- a document was detected, but it is off-center.ERROR_TOO_DARK- a document was not found, most likely because of bad lighting conditions.ERROR_TOO_NOISY- a document was not found, most likely because there is too much background noise (maybe too many other objects on the table, or the background texture is too complex).ERROR_NOTHING_DETECTED- a document was not found. The document is probably not in the viewport. Usually it does not makes sense to show any information to the user at this point.
Handling camera picture
Once a picture has been taken, whether automatically by the Auto Snapping feature or manually by the user, you have to handle the image data by implementing the method abstract fun onPictureTaken(image: ByteArray, captureInfo: CaptureInfo) of the PictureCallback class.
In this method you receive the image byte array of the original picture data and the image orientation value.
It is important to understand that this image data represents the original picture and not the cropped document image.
To get the cropped document image, you have to perform document contour detection on the original image and apply the cropping operation by using the ContourDetector class:
// Create one instance per screen
val detector: ContourDetector = ScanbotSDK(context).createContourDetector()

//...

cameraView.addPictureCallback(object : PictureCallback() {
   override fun onPictureTaken(image: ByteArray, captureInfo: CaptureInfo) {
        fun restartCamera() {
            // Continue with the camera preview to scan the next image:
            cameraView.post {
                cameraView.continuousFocus()
                cameraView.startPreview()
            }
        }

        // Decode image byte array to Bitmap, and rotate according to orientation:
        val bitmap = ImageProcessor(image).rotate(captureInfo.imageOrientation).processedBitmap()

        if (bitmap == null) {
            // license or feature is not available
            restartCamera()
            return
        }

        // Run document contour detection on original image:
        detector.detect(bitmap)
        val detectedPolygon = detector.polygonF
        if (detectedPolygon != null) {
            // And crop using detected polygon to get the final document image:
            val documentImage = ImageProcessor(bitmap).crop(detectedPolygon).processecdBitmap()

            // Work with the final document image (store it as a file, etc)
            // ...

            restartCamera()
        }
    }
})
Handling the image orientation
The value of the captureInfo.imageOrientation parameter requires a special handling on some Android devices. It represents the image orientation based on the current device orientation.
On most Android devices the value of captureInfo.imageOrientation will be 0, but on some devices (like most Samsung devices) the value will be 90.
You have to handle this value accordingly and rotate the original image. See the example code above or our example app.
FinderPictureCallback
The user has an ability to use an "advanced" version of PictureCallback - FinderPictureCallback, that binds the FinderOverlayView feature, ImageProcessor and the camera snapping mechanism.
This callback automatically crops a part of the snapped image which is visible in the Finder view and rotates the cropped image according to the imageOrientation value.
To instantiate FinderPictureCallback the user has to pass an instance of ImageProcessor to the FinderPictureCallback's constuctor.
As the result, the user will get an image in a Bitmap format in the abstract fun onPictureTaken(image: Bitmap?, captureInfo: CaptureInfo) method of the FinderPictureCallback.
val scanbotSDK = ScanbotSDK(this)
cameraView.addPictureCallback(object : FinderPictureCallback() {
   override fun onPictureTaken(image: Bitmap?, captureInfo: CaptureInfo) {
        // Work with the final image (store it as file, etc)
        // ...

        // Continue with the camera preview to scan the next image:
        cameraView.post {
            cameraView.continuousFocus()
            cameraView.startPreview()
        }
    }
})
Document detection
ContourDetector
is used to perform document detection in Scanbot SDK.
The Document Detection in Scanbot SDK is based on edge detection. To detect edges and get the boundaries of a
document in a still image, use the detect(image) method of ContourDetector:
val detector = ScanbotSDK(context).createContourDetector()
val result = detector.detect(origininalBitmap)  // pass a Bitmap or the image data as byte[]
val polygon = detector.getPolygonF()
This code detects boundaries and receives a DetectionResult,
which is an enum that represents the recognition status.
Regardless of the DetectionResult, you can acquire the detected boundaries as a polygon using the detector.getPolygonF() method. If the polygon was not detected, it will return an empty List. On successful detection, you will get a List with 4 points, one for each corner - top_left, top_right, bottom_right, bottom_left. Each point has coordinates in a range between [0..1], representing a position relative to the image size. For instance, if a point has the coordinates (0.5, 0.5), it means that it is located exactly in the center of the image.
Types of Document Detection algorithms
The user can select the technology that will be used for document detection. There are two options: Edge-based and ML-based. The Edge-based technology detects all the edges in the picture and then predicts which of those edges may form the document. The ML-based approach finds a document using computer-vision technologies. The ML-based approach might be much faster for Live-detection than the Edge-based approach.
Since Scanbot SDK 1.81.0, it is included in io.scanbot:sdk-package-X modules by default. If the application does not require the document detection feature at all, or an Edge-based approach is preferred, you can reduce the .apk size (~4MB) by excluding this Gradle dependency as follows:
implementation("io.scanbot:sdk-package-Y:$scanbotSdkVersion") { // REPLACE 'Y' with your SDK-package number!!!
    exclude group: "io.scanbot", module: "bundle-sdk-ml-docdetector"
}
To select the type of Document Detection technology, use the following snippet during SDK initialization. The ML-based approach will be used by default.
import io.scanbot.sdk.ScanbotSDKInitializer

class ExampleApplication : Application() {

    override fun onCreate() {
        super.onCreate()

        // Initialize the Scanbot Scanner SDK:
        ScanbotSDKInitializer()
             .contourDetectorType(ContourDetector.Type.ML_BASED) // ML_BASED is default. Set it to EDGE_BASED to use the edge-based approach
             .initialize(this)
    }
}
To get an instance of a ContourDetector, use the ScanbotSDK object. It will create a NEW contour detector for each call.
import io.scanbot.sdk.ScanbotSDKInitializer

    ...

val detector = ScanbotSDK(context).createContourDetector()
The ContourDetector() constructor was marked as deprecated. It will create an instance of the document detector with Edge-based technology under the hood and ignore the setting passed to ScanbotSDKInitializer.
Want to scan longer than one minute?
Generate a free trial license to test the Scanbot SDK thoroughly.
Get your free Trial LicenseWhat do you think of this documentation?
What can we do to improve it? Please be as detailed as you like.